This post continues to discuss the World Bank Major Contract Awards network that I introduced in this blog post. But since I'm about to introduce a submodel for Niger and use it to describe how the per-country links of the World Bank model are organized, it seems like a good time to take a brief detour (a Strange Interlude?) and provide a quick tutorial on how to build such a submodel. Obviously, when dealing with a large network, you need to be able to look at subgraphs in isolation, and BioFabric provides this capability. (N.B. Version 1.0.0 currently supports only one submodel view; the long-term plan is to support a model hierarchy like the one provided by BioFabric's older brother BioTapestry.)
Start by loading up the full network into BioFabric:
 |
| Click to enlarge picture |
A submodel is built by first selecting some set of nodes and associated edges in the main network. There are several ways to select things, e.g. clicking on node rows, but for this quick example I will just use the search function to find and select Niger. Start by clicking on the Search for Nodes... button on the toolbar:
| Click to enlarge picture |
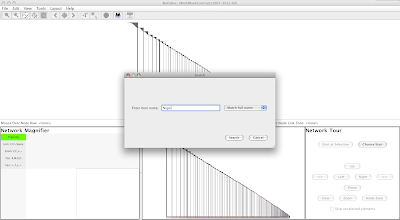
This causes the search dialog to pop up. Type Niger into the text box, and keep the setting at Match full name; otherwise your search results will also include e.g. Nigeria:
 |
| Click to enlarge picture |
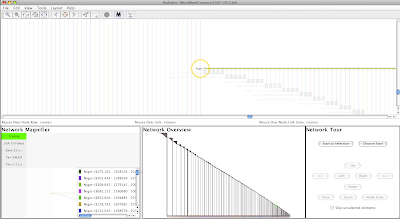
Click Search in the dialog, and the view will zoom into the left-end label of the Niger node row, with the node label highlighted with the orange selection circle:
 |
| Click to enlarge picture |
What we want to do is create a submodel that includes all the first neighbors of Niger, as well as the edges to those neighbors. This step is easy; you just click on the Add First Neighbors to Selection button on the toolbar:
| Click to enlarge picture |
If you zoom out a bit and (PC) Ctrl- or (Mac) Command- mouse drag over to the right, you will see Niger and all its incident links selected:
 |
| Click to enlarge picture |
Now, click on the Send Selections to Subset View button on the toolbar:
| Click to enlarge picture |
And the subset view of Niger and its first neighbors shows up in a new window, so you can now study the submodel in detail, as the neighbor nodes at the very bottom have been brought up right under the other nodes:
 |
| Click to enlarge picture |
Notably, the precise row-and column ordering of a BioFabric network allows the subgraph to share exactly the same ordering of nodes and edges as the main network. The only difference is the unused rows and columns of the main graph are compressed out of the subgraph view. In fact, that's why the "global player" nodes at the bottom extend out to the far left of the submodel, because those node lines originated in columns to the left of the Niger node in the main network view. The submodel layout compresses out unused columns, but never changes the ordering of the network elements.
That's all there is to creating a submodel view! In the next posting, I will use this Niger submodel to focus in on, and discuss, the small-scale organization of the model edges.
No comments:
Post a Comment